The Origins of Coil Pot Making
The art of making coil pots ceramics dates back thousands of years, with evidence found in ancient civilizations across the globe. This technique involves creating pottery by hand-rolling and stacking clay coils. Artisans then merge these coils together to shape and build the walls of vessels. Coil pots are one of the most enduring and universal forms of ceramics, often associated with the most basic and intimate acts of crafting.
The earliest coil pots appeared in various regions, from Africa to the Americas, demonstrating the wide reach of this craft. Ancient coil pots often held cultural significance and were integral to daily life and rituals. The method allowed for versatility and expression, helping early potters to make functional and decorative items suited to their local needs and aesthetic preferences.
Despite its ancient roots, the appeal of coil pots ceramics persists today. Hobbyists and professional artists alike still embrace the traditional techniques, valuing the connection to the past and the hands-on experience. Making coil pots requires patience and skill, offering a meditative and fulfilling process that continues to captivate modern artisans.
Essential Tools for Crafting Coil Pots
To start making coil pots ceramics, you will need some basic tools. These tools are simple but vital for creating your pottery pieces. First, you’ll require a smooth surface on which to work, such as a wooden board or a canvas mat. A rolling pin also helps to roll out even clay coils. Look for one specifically meant for clay, as it will resist sticking.
Next, you’ll need a variety of rib tools. These come in shapes like kidneys or ovals, made from metal, wood, or silicone. Ribs help to smooth and shape the clay walls. They’re essential for joining coils neatly.
Slip is a liquid form of clay and acts as a glue to secure the coils together. You can make it by mixing water with the same clay you’re using for your pot. Keep a small bowl of slip handy while you work.
A wire cutter is also important. Use it to cut through clay with precision. It’s handy when you’re preparing your coils or when trimming the top edge of your pot.
Lastly, sponges and brushes should be part of your toolkit. They are great for smoothing surfaces and for adding water to the clay when it starts to dry.
With these basic tools, you’re set to begin crafting beautiful coil pots ceramics with your own hands.
Step-by-Step Guide to Making a Coil Pot
Creating a coil pot ceramics masterpiece involves a set of sequential steps. Let’s walk through the process step by step so you can begin crafting with confidence.
- Prepare the Clay: Begin by kneading your clay to remove any air bubbles. This step is crucial for a strong final product.
- Roll Coils: Use your rolling pin to roll out long, even coils. Aim for consistency in thickness and width.
- Form the Base: Flatten a piece of clay for the base and scratch its surface. This provides a better hold for the coils.
- Attach Coils: Apply slip to the base’s edges and place your first coil around it. Smooth out the joint where the coil meets the base.
- Build the Walls: Add more coils, layer by layer. Use rib tools to smooth out the joins, ensuring coils adhere well.
- Shape the Pot: As your pot grows, shape it with your hands and rib tools. Be creative and mold the form you desire.
- Finish the Rim: Once your pot reaches the desired height, trim the rim to make it even. Smooth it out for a clean finish.
- Dry the Pot: Allow your pot to dry slowly. It should be leather-hard before you fire it.
- Refine the Surface: Use sponges and brushes to refine your pottery’s surface. Now’s the time to add any final touches.
- Bisque Fire: The first firing is called bisque firing. It hardens the pot and prepares it for glazing.
By following these steps, you’ll create a coil pot with charm and individuality. The key is patience and enjoying the crafting process. Make sure to review the ‘Essential Tools for Crafting Coil Pots’ section before starting, and soon you’ll have your very own handcrafted coil pot ceramic.
The Artistic Elements of Coil Pot Design
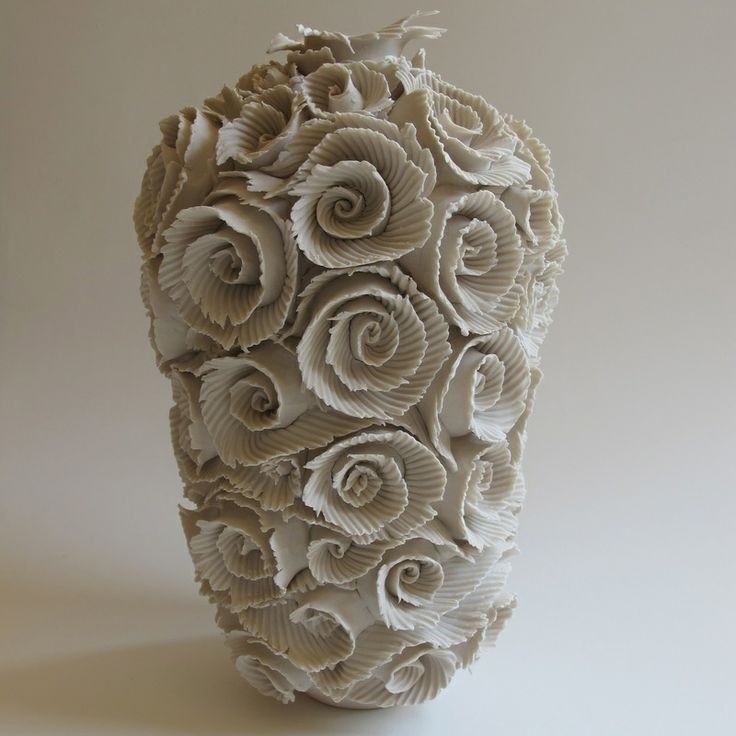
Creating coil pots ceramics is more than crafting a vessel; it’s an expression of art. The design of a coil pot is where personality and creativity shine. We consider texture, shape, and pattern to give each piece a distinct character.
Texture: Play with the clay’s surface to make unique textures. Pressing tools, stamps, or even fingers can create patterns on the pot. These textures can bring life and visual interest to your work.
Shape: While building the pot, visualize its silhouette. Flared tops, rounded bodies, or sharp angles make each pot special. Use your hands and tools to sculpt the desired form.
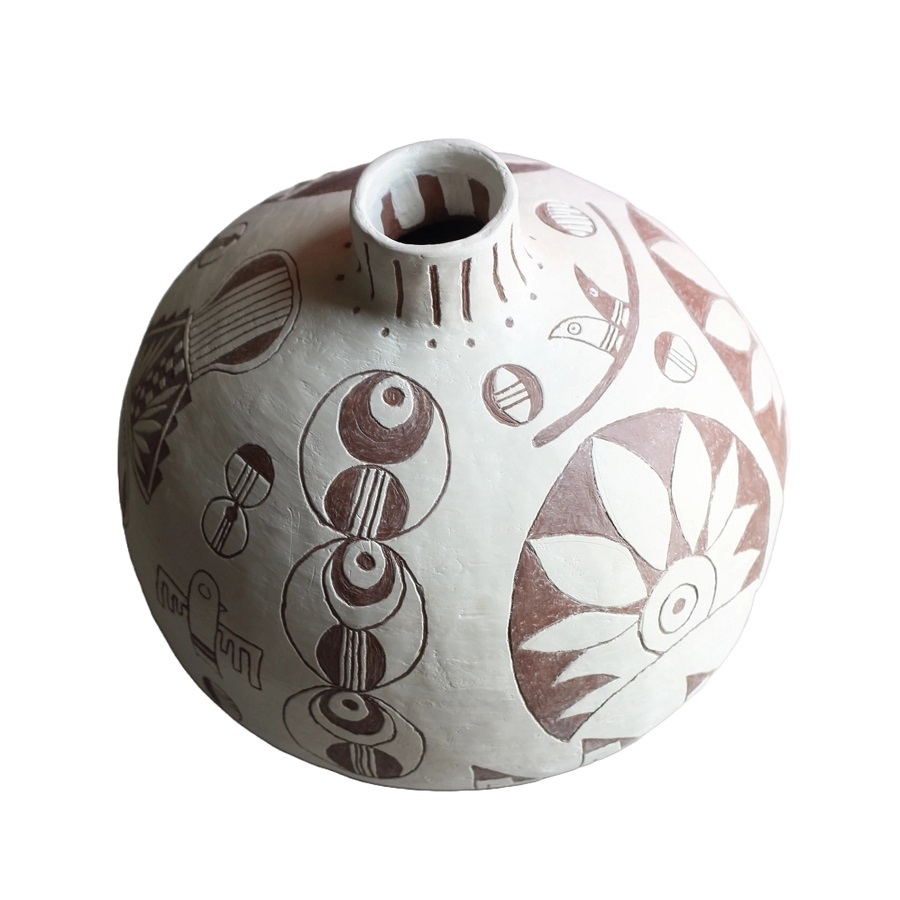
Pattern: Coil placement can form intricate patterns. Overlapping coils or varying sizes can add rhythmic beauty. Patterns can be symmetrical or asymmetrical, depending on your vision.
Color: While not intrinsic to the coil pot design, color comes into play post-firing. The choice of glazes can transform your pot, making it vibrant or subdued.
The design elements you choose will affect the pot’s style and function. A mix of techniques can produce unique, eye-catching pieces that reflect the maker’s artistic voice. Remember, each decision in the design process contributes to the coil pot’s final look and feel.
Glazing and Firing: Finishing Your Coil Pot
Creating a coil pot doesn’t end with its shaping. The next crucial steps are glazing and firing. Glazing involves applying a glass-like coating to your pot. This step adds color and shine and makes the pot more functional by waterproofing it. Firing hardens the clay and sets the glaze.
Choosing a Glaze: Select glazes that complement your design. Consider how colors change after firing. Test glazes on sample tiles before applying them to your pot.
Applying Glaze: Brush on the glaze or dip your pot into it. Make sure it’s an even coat. Avoid glazing the bottom, or it might stick to the kiln shelf.
Firing the Pot: There are two main firing processes – bisque and glaze firing. After the bisque firing, your pot is ready for the glaze. The final glaze firing sets the glaze, and temperatures can reach over 1200 degrees Celsius.
Cooling Down: After firing, your pot needs to cool. Rushing this stage can crack the pottery. Let it cool slowly in the kiln before you take it out.
The joy of seeing your handcrafted coil pot ceramics come out of the kiln is unmatched. Through the glazing and firing process, you give your pot its finished beauty and resilience.
Inspiration from Masters: Notable Coil Pot Artists
Drawing inspiration from masters of coil pots ceramics can greatly enhance your craft. Studying the work of notable artists offers a wealth of ideas and techniques. Here are some of the eminent figures in the world of coil pot making whose works have inspired generations.
Maria Martinez: Famous for her black-on-black ceramic vessels, Maria Martinez is a pivotal figure. Her traditional Pueblo pottery techniques and unique designs have influenced many contemporary potters.
Magdalene Odundo: Odundo’s hand-built pieces are renowned for their smooth surfaces and organic shapes. She draws on traditional Kenyan pottery methods while adding a modern flair.
Peter Voulkos: Known for his aggressive manipulation of the clay, Voulkos turned coil pot making into a sculptural art form. His work shows daring, experimental approaches to the traditional craft.
Lucie Rie: Rie brought a fresh, modernist approach to pottery. She is known for her delicate, wheel-thrown pots, but her coiled work displays a masterful touch and elegance.
Ruth Duckworth: Her modernist ceramic murals and monolithic sculptures, often using coiled techniques, transcend conventional boundaries of coil pot ceramics.
By immersing yourself in the works of these and other great artists, you can gain perspective on the diverse possibilities within the realm of coil pots. Even as you admire their accomplishments, remember to let your own style shine through in every piece you create.
Incorporating Modern Twists in Traditional Coil Pottery
Traditional coil pots ceramics are renowned for their timeless beauty and handcrafted appeal. However, the art of coil pot making is not frozen in time. Modern artisans often infuse traditional methods with contemporary twists, creating a bridge between the past and present. Here are some ways in which potters are giving coil pottery a modern edge:
- Innovative Materials: While clay remains the central material, potters are experimenting with different clays and infusions. Additives like grog or paperclay can alter the texture, strength, and weight of the coil pots.
- Mixed Media: Some artists incorporate non-ceramic elements into their work. They intertwine metals, glass, and fibers with the clay, pushing the boundaries of traditional coil pot design. This mixed media approach brings a surprising element to each piece.
- Advanced Tools: Laser cutters and 3D printers are entering the pottery studio. These tools help create precise patterns and structures to be integrated into coil pots or used for making stencils for decoration.
- Bold Glazing Techniques: Traditional glazes are sharing the limelight with vibrant, experimental colors and finishes. Potters are using multiple layers, dripping, and even spray-painting glazes to achieve unique effects.
- Sustainable Practices: Sustainability is a priority, with potters sourcing locally available materials and employing eco-friendly firing practices. They are also recycling clay and glaze materials more conscientiously.
By incorporating these modern twists, artists are enriching the craft of coil pot ceramics. These innovations not only add aesthetic value but also redefine what coil pottery can embody. They are not just preserving the technique; they are evolving it.
Preserving the Craft: Workshops and Communities
The art of crafting coil pots ceramics continues through workshops and communities. These spaces play a crucial role. They keep the tradition alive and offer support for potters at all levels. Here are some ways they contribute:
- Skills Sharing: Workshops provide a platform for artisans to share their skills. Beginners learn the basics while seasoned potters discover new techniques.
- Community Events: Pottery communities often host events. These include markets, exhibitions, and fairs. Artists showcase their work and connect with fellow potters.
- Collaborative Projects: Working together, potters take on large projects. They exchange ideas, pushing their creative boundaries.
- Mentorship: Experienced potters mentor the new generation. They guide and encourage newcomers to the craft.
- Sustainable Practices: Groups focus on sustainable methods. They promote the use of local materials and eco-friendly practices.
- Cultural Preservation: By holding onto traditional methods, communities help preserve cultural heritage. They ensure the art form does not fade away.
- Adaptation and Growth: Workshops and communities adapt to changes. They blend old and new to foster the craft’s growth.
The joy of coil pots ceramics is shared and sustained through these communal efforts. If you’re looking to immerse yourself in this craft, seek out local workshops and pottery communities. They offer a wealth of knowledge and companionship on your ceramic journey.