Introduction to Mold Making and Casting in Art
Casting art offers unique ways for artists to express themselves. This art form allows for precise replication of shapes and intricate designs. Mold making, a crucial step in casting, involves creating a negative form of an object. This form then serves as a ‘mold’ for casting materials. Artists often use diverse materials such as plaster, silicone, or latex for molds. These materials capture the original object’s details.
Casting comes next. This process involves filling the mold with materials like metal, resin, or concrete. The filled mold takes the shape of the original object, allowing for multiple copies. This technique is especially helpful for sculptors, jewelry makers, and mixed media artists. It provides a way to reproduce complex details with precision.
In essence, casting art is all about transformation. It turns ideas into tangible pieces with depth and texture. Mold making and casting also enable artists to create works in limited or mass numbers. This way, more people can enjoy a single piece of art. Both beginners and experienced artists use these techniques to explore new dimensions in their work. Whether one is crafting a sculpture or designing a piece of jewelry, mold making and casting offer vast possibilities.
The Essential Materials for Mold Making
When starting mold making, selecting the right materials is key. Artists choose based on the project’s needs. Here, we outline materials commonly used in the mold making process.
- Plaster: Often used for larger molds due to its cost-effectiveness and ease of use. It requires a release agent to separate the cast.
- Silicone Rubber: Great for capturing fine details and undercuts. Silicone molds are flexible and durable, but more costly than plaster.
- Latex: An affordable option for creating flexible molds. Best for simpler shapes, but latex molds have a shorter lifespan and need careful storage.
- Urethane Rubber: Another versatile option suitable for a variety of projects. It’s durable and can create strong, detailed molds.
- Release Agents: These are applied to the master model to prevent sticking. Options include petroleum jelly and commercial mold release sprays.
Each material has pros and cons. Consider the intricacy of your project and your budget when choosing. Plaster might work for a straightforward, larger piece. Silicone or urethane rubber could be better for complex shapes needing finer detail. Always make sure to use a suitable release agent to protect your original model and ensure a clean cast.

Step-by-Step Guide to Creating a Mold
Creating a mold is a detailed process that follows several key steps. Here’s a simplified guide to help you through it.
- Choose the Original Model: Your first step is to pick an object, known as the ‘master’, that you wish to replicate.
- Prepare the Master Model: Clean the object. Ensure it’s free from dust or imperfections. Apply a release agent.
- Construct a Mold Box: Build a container around your master model. The size should allow some space around the object.
- Select Your Mold Material: Decide between plaster, silicone, latex or urethane rubber based on your project needs.
- Mix Mold Material: Follow the manufacturer’s guidelines to mix your chosen material to the right consistency.
- Pour the Mold Material: Carefully cover the master model with the mold material. Avoid air bubbles.
- Let it Cure: Allow the mold to set. Wait for the recommended curing time before you move forward.
- Remove the Master: After the mold has set, gently extract the master model from the mold.
- Clean the Mold: Check the mold interior for any leftover material and clean it well.
Following these steps will help you create a successful mold, ready for the casting process.
Overview of Casting Techniques and Applications
Casting techniques offer artists many ways to shape their work. These methods transform materials into art with precision. For varied effects, artists use different casting methods. Let’s dive into some popular techniques and their applications in the art world.
Lost-Wax Casting
This ancient method is still used for fine detail work, especially in metals. An artist sculpts in wax, invests it in a ceramic shell, melts out the wax, and pours in molten metal. This technique is ideal for sculptures and intricate jewelry.
Sand Casting
Sand casting is simple and cost-effective, great for larger pieces. Artists press the original into sand to create a mold. Then, they pour metal or other materials into this cavity. It’s often used for bronze sculptures.
Plaster Casting
Plaster casting uses a plaster mold for delicate details. It’s common in art classes and for reproductions. Artists pour liquid plaster into molds of clay or other materials. This is perfect for making copies of statues and reliefs.
Resin Casting
Resin casting allows for color and special effects. Artists mix liquid resin with a hardener and pour it into molds. It’s versatile for small sculptures, decorative pieces, and jewelry.
These are just a few examples of casting methods. Artists pick methods based on the art they’re creating. Each method has its own set of materials and steps. When mastered, these techniques let artists replicate or create a vast array of beautiful, intricate works. Casting is truly a blend of art and alchemy, transforming raw materials into lasting works of art.

Tips for Successful Plaster Casting
To excel in plaster casting, careful attention to detail and technique is essential. Here are some tips that can help ensure that your plaster casts turn out as intended.
- Properly Prepare Your Mold – Clean your mold thoroughly and apply a mold release agent. This will help in easy removal of the cast once it’s set.
- Mix Plaster Accurately – Follow the manufacturer’s instructions for mixing ratios. An accurate mix will prevent flaws in your cast.
- Pour Carefully – Pour the plaster slowly to avoid air bubbles. Air bubbles can cause imperfections in your final piece.
- Cure Completely – Allow the plaster to cure fully before removing it from the mold. Rushing this step can result in a cast that hasn’t set properly.
- Remove Gently – Take caution when removing the plaster cast from the mold. Rough handling might damage the mold and cast.
- Finish Smoothly – Use sandpaper to smooth out any rough areas. A smooth finish can make a big difference in the appearance of your cast.
By adhering to these steps, you are more likely to achieve a clean and detailed plaster cast that captures all the intricate design features of your original model.
Innovations in Clear Polyurethane Castings
Polyurethane casting has revolutionized how artists create clear and translucent pieces. This technique allows for casting materials that set into durable and clear forms. These forms can range from detailed miniature models to large, transparent sculptures. Polyurethane has become a popular choice for artists due to its versatility and clear finish.
Advantages of Polyurethane Casting
- Strength and Durability: Castings made from polyurethane are strong and last long.
- Flexible Design Options: This material lets you bend or twist casts without them breaking.
- Ease of Use: Polyurethane mixes and sets quickly, which is convenient for artists.
- Customizable: You can add colors and finishes to polyurethane, creating various looks.
To succeed in clear polyurethane casting, measure the resin and hardener accurately. Mix them well to prevent bubbles. Apply a mold release agent to the mold before pouring. This helps the finished product come out smoothly and without sticking.
Tips for Achieving Clear Casts
- Measure Carefully: Exact measurements ensure the mix cures as needed.
- Remove Bubbles: Bubbles can ruin the clarity of a piece; mix and pour slowly.
- Apply Release Agent: A good mold release agent prevents sticking and helps maintain mold quality.
Clear polyurethane casting opens up new paths for artistic expression. Artists can work with a material that delivers clarity and allows for replication of intricate designs. Innovations in material technology continue to enhance the capabilities and ease of use for artists. This keeps the art of casting exciting and full of potential for new discoveries and creations.
The Intricate World of Silicone Mold Making
Silicone mold making is a favorite among artists for its precision and flexibility. This process transforms creative ideas into enduring art forms. Here is a closer look at utilizing silicone for molds.
Silicone rubber, a common choice, captures even the tiniest details. It works well for irregular objects with undercuts. Silicone molds are also reusable, making them cost-effective for artists.
To begin, clean your object thoroughly. The master must be free of dust and defects for the best outcome. Next, apply a release agent, like a spray or liquid, to prevent sticking. Then mix the silicone rubber as directed—pay careful attention to ratios. Pour the rubber over the master object slowly to avoid air traps. Allow enough time for the silicone to cure. It varies by product but is crucial for a successful mold. After curing, remove the master carefully to preserve the mold’s fine details.
Silicone molds can withstand repeated use. Their durability makes them suitable for many projects. Artists often pick silicone when they need molds that last. Silicone’s adaptability allows for complex creations in various mediums. With proper care, a silicone mold can be a valuable tool in an artist’s repertoire for years.
In summary, silicone mold making is ideal for its detail and resilience. Choose this method for intricate projects that require a high level of detail and flexibility. With the right approach, silicone molds can support your artistry and expand your creative possibilities.

Advanced Casting Techniques and Their Artistic Applications
Advanced casting techniques have expanded artists’ horizons, enabling them to craft remarkable and diverse pieces with precision. Let’s delve into some of these sophisticated methods and explore how they contribute to different art forms.
Lost Foam Casting
Lost foam casting is a method where artists carve a model out of foam which vaporizes when molten material is poured in, leaving a detailed casting. Particularly useful for complex pieces, it saves time and material.
Vacuum Casting
This entails drawing out air from the mold cavity using a vacuum, before the casting material is poured in. The result is a high-quality cast with fewer imperfections and increased detail.
Rotational Casting
Also known as rotocasting, this process involves a hollow mold that is filled with material and then slowly rotated. The material coats the inside of the mold evenly, creating lightweight and uniform hollow casts.
Centrifugal Casting
In centrifugal casting, a mold rotates rapidly about a central axis as the molten material is introduced, forcing the material to the mold’s edges. This results in highly detailed, dense casts, ideal for rings or cylinders.
Investment Casting
This is an intricate process where a wax model is encased with a heat-resistant investment material. Once the wax is melted away, molten metal fills the space, creating an exceptionally precise reproduction.
Artists utilize these advanced techniques to capture the essence of their creativity and manifest works in all forms, from wearable art to grand-scale installations. The level of detail afforded by these processes allows for individual expression in myriad art practices.
These advanced techniques can require more equipment and expertise, but the finished outcomes are often unparalleled, giving artists the ability to push boundaries and create with virtually no limits. Embracing such methods opens up worlds of artistic potential where imagination can truly take form in tangible, captivating art.
Integrating Mold Making and Casting in Mixed Media Art
Mold making and casting techniques can add new textures and forms to mixed media art. They allow artists to reproduce objects or create unique elements within their art. For mixed media, the possibilities are expansive. Artists might cast a small item, like a leaf or a button, and include it in a larger piece. Or, they might create a textured background by casting interesting shapes into a flat mold.
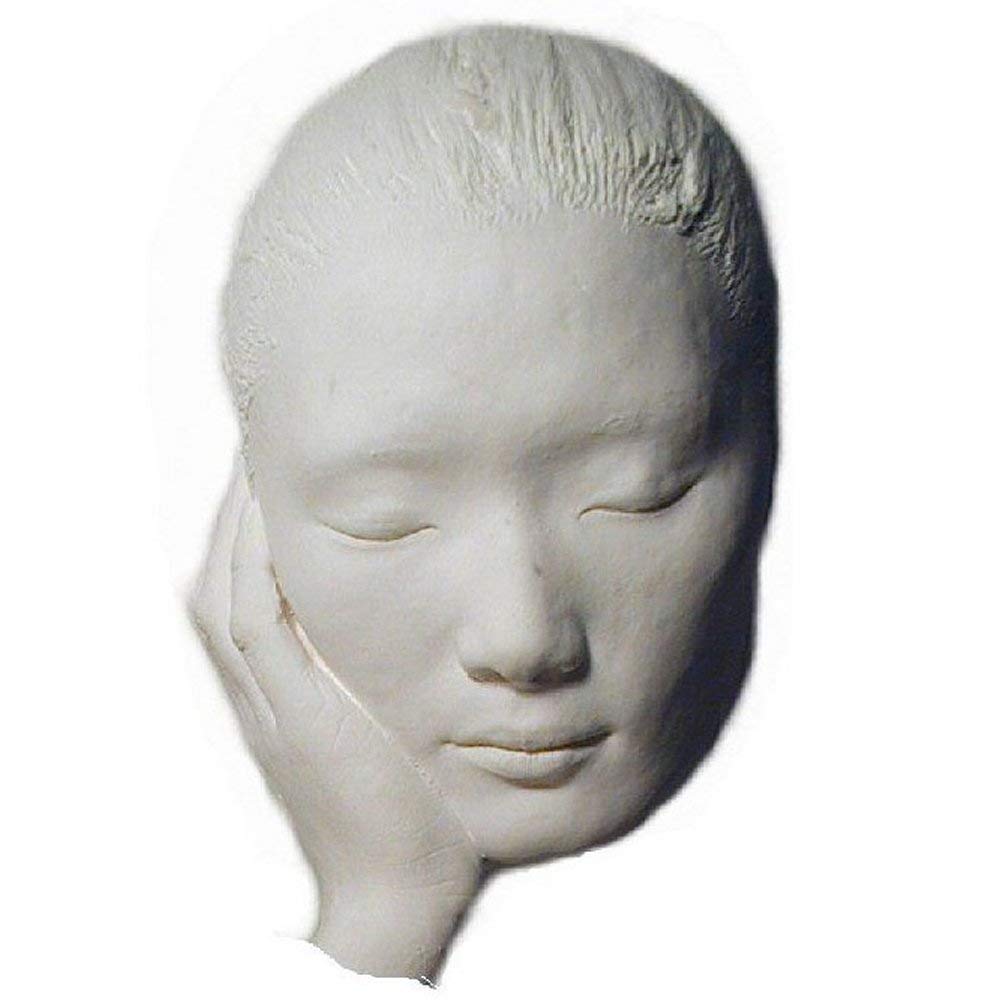
With these techniques, mixed media pieces gain depth and dimension. For example, an artist could cast multiple tiny stars and scatter them on a canvas depicting a night sky. They could also cast a three-dimensional face that emerges from a painted surface. Both methods enhance the visual impact.
Mold making and casting are perfect for embedding objects in resin, too. Artists might place a cast flower or an old coin into a clear resin layer. This technique preserves the object and gives a sense of depth.
For artists curious about these methods, mold making and casting supplies come with instructions. Even beginners can start simple projects and progress to more complex designs. As they gain confidence, mixed media artists can explore more advanced mold making types like silicone. This offers durability and detail for intricate cast pieces.
Here are steps for integrating mold making and casting into mixed media art:
- Select items to replicate or create molds for.
- Prepare and cast molds using suitable materials.
- Paint or alter cast items to match your artistic vision.
- Securely attach cast pieces to your mixed media canvas.
- Use resin or other adhesives to embed objects for a layered effect.
In summary, mold making and casting open up new avenues for creativity. These techniques allow mixed media artists to expand their work in exciting, tangible ways.
Learning Resources: Tutorials and Masterclasses
Whether you are new to casting art or an experienced artist seeking to refine your skills, a wealth of learning resources awaits you. With the right guidance, you can master the complexities of mold making and tap into the full potential of your creative prowess. Below, we’ve compiled a list of resources that offer tutorials and masterclasses to enhance your mold making and casting techniques.
- Online Video Tutorials: Sites like YouTube are treasure troves of instructional videos. You’ll find step-by-step tutorials on everything from basic plaster casting to advanced silicone mold making.
- Art Supply Stores: Many art supply stores host workshops and classes on mold making and casting. These can provide hands-on experience under the guidance of skilled instructors.
- Books and Manuals: For those who prefer self-study, there are plenty of books and detailed manuals available. These often contain in-depth explanations and illustrations.
- Artist Forums and Communities: Online forums and communities of artists are excellent places to ask questions, share experiences, and get advice from peers and professionals.
- Local Art Schools and Colleges: Many educational institutions offer short courses or continuing education classes in mold making and casting.
- Artists’ Blogs and Websites: Follow blogs and websites of experienced artists. They may offer personal insights, advanced tips, and tutorials on their craft.
Taking the initiative to learn from these resources is the first step on your path to mastering the art of mold making and casting. Always keep in mind the safety precautions when handling materials and ensure your work area is well-ventilated. As you progress, don’t hesitate to challenge yourself with new techniques, and share your newfound knowledge within the artist community.