Charcoal drawing is a versatile medium that allows artists to explore a range of tones and textures, creating stunning visual effects. Among the various techniques available, mastering the use of contrast is crucial for adding depth and dimension to your artwork. This article will guide you through the art of contrast in rose charcoal drawing, providing tips and techniques to enhance your skills and elevate your work.
Understanding Charcoal as a Medium
Types of Charcoal
Before diving into the specifics of contrast, it’s essential to understand the different types of charcoal you can use. The two primary types are vine charcoal and compressed charcoal. Vine charcoal, made from burnt willow sticks, produces soft lines that are easy to erase, making it ideal for sketching and blending.
Compressed charcoal, on the other hand, results in darker, more intense lines. This variety allows for rigid shading and intricate details. You may want to experiment with both types to discover how they can complement each other in your drawings. Utilizing a mix of these will enable you to create a broader range of tones and contrasts.
Benefits of Using Charcoal
Charcoal is favored for its rich texture and versatility. It blends easily, allowing artists to achieve smooth gradients and soft transitions. The ability to layer and build up depth using different pressures on the paper is invaluable for adding life to your drawings.
Moreover, charcoal’s forgiving nature means you can easily make adjustments. This quality encourages experimentation, giving artists the freedom to explore without fear of permanent mistakes. Working with charcoal can be liberating and offers a unique tactile experience.

The Importance of Contrast
What is Contrast?
Contrast refers to the difference between the dark and light areas in a drawing. In charcoal art, this concept translates to varying values that create visual interest and depth. High contrast enhances dramatic effects and helps define shapes, while low contrast tends to yield a softer, more subtle effect.
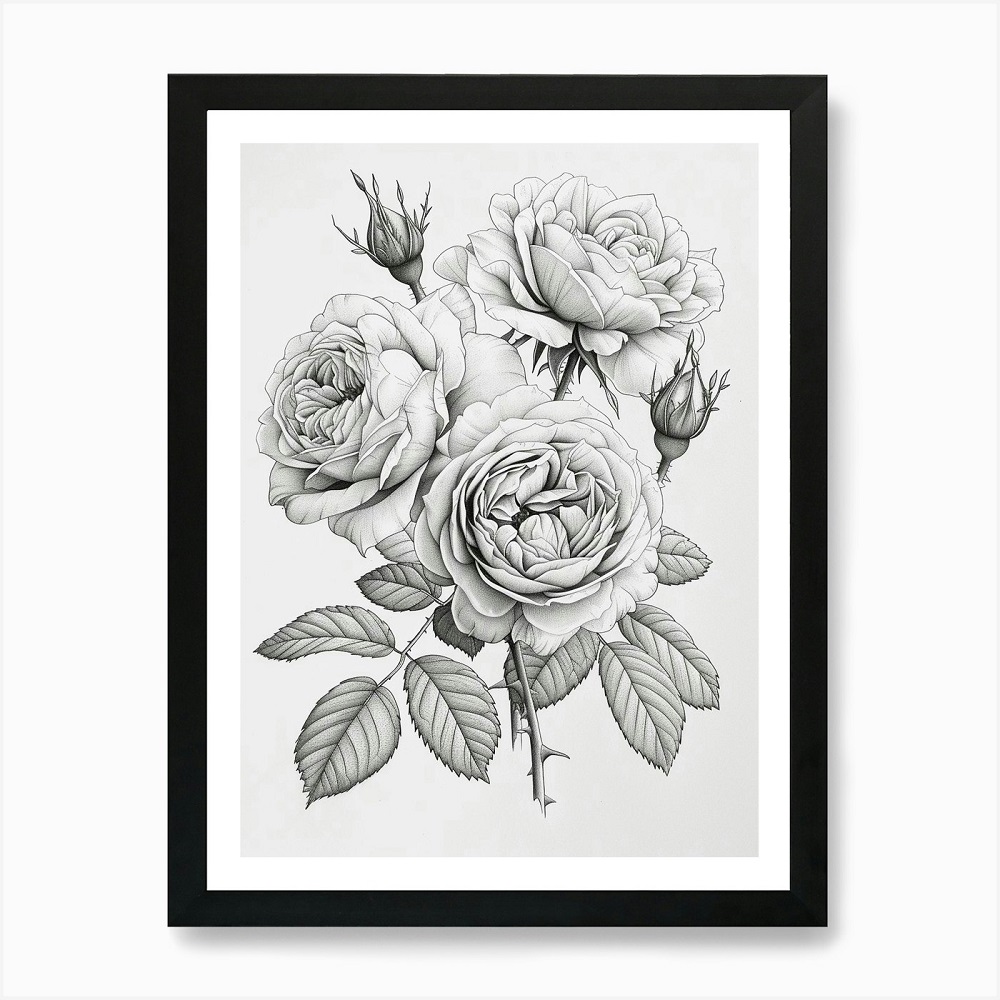
In rose charcoal drawing, where the intent is often to capture the beauty and texture of petals, understanding contrast becomes pivotal. It allows you to emphasize the delicate nuances that make flowers captivating. When used effectively, contrast can move an artwork from flat to dynamic.
Emotional Impact
Beyond technical aspects, contrast plays a crucial emotional role in art. High-contrast images often convey intensity and drama, capturing the viewer’s attention instantly. In contrast, softer images may evoke calmness and tranquility. Depending on your artistic intention, you can manipulate contrast to evoke specific feelings and responses in your audience.
Consider what mood you want to convey with your rose drawing. Should it feel romantic and soft, or bold and striking? Understanding how contrast influences emotion will guide your choices in shading and detailing.
Setting Your Foundation
Choosing Your Subject and Composition
Before starting your rose charcoal drawing, it’s essential to select a subject that allows for the exploration of contrast. Roses, with their layered petals and varied shapes, make an excellent choice for this. Create a simple composition where the rose is the focal point and consider adding elements like leaves or background shapes that will enhance the contrast.
Sketch the basic outline of your rose lightly with vine charcoal. Focus on the overall arrangement rather than details at this stage. This initial sketch will serve as your foundation, guiding further development in contrast and depth.
Lighting Considerations
Lighting is a vital factor in creating contrast. Consider the source of light and how it interacts with your subject. Dramatic lighting creates deep shadows that help define the forms of the petals, while softer lighting emphasizes subtle transitions.
If you want to create a more intense look, position your light source at a sharp angle for strong highlights and deep shadows. Alternatively, for a softer effect, place the light source in front of the subject. Observing how light affects your rose will provide you with insights into where to place highlights and shadows in your drawing.

Layering Techniques
Building Up Depth
One of the most effective methods for creating contrast in rose charcoal drawing is through layering. Begin by applying a light layer of compressed charcoal to establish the darkest areas of your drawing. Use a variety of strokes to give texture and volume to the petals.
As you work, increase the pressure gradually to build depth. Remember to leave areas blank where highlights will go. The beauty of charcoal lies in its ability to layer, allowing you to refine and enhance values over time. You can soften harsh lines by blending with a tortillon or your fingers to create smooth transitions.
Incorporating Highlights
After establishing darker tones, it’s time to incorporate highlights. Use a kneaded eraser to gently lift the charcoal from specific areas, revealing the paper beneath for a striking contrast against the darker tones. This technique is particularly effective for capturing the light reflecting on the petals of a rose.
Carefully pinpoint where the light hits the rose and apply this erasing technique. Keep in mind that sometimes less is more; subtle highlights will often provide a more realistic portrayal than overdone ones. Finding the right balance will enhance the overall effect of your drawing.
Refining Details
Adding Texture and Definition
Once the basic structure and contrast are established, focus on refining the details of the rose. Use fine-tipped charcoal pencils to add intricate details to the petals and leaves. This will allow for more controlled applications, enhancing the definition in areas where contrast is critical.
Pay close attention to the contours of the petals. Apply varying levels of pressure to capture the subtle textures and shapes. Shadows created under overlapping petals can enhance depth and add realism to your drawing. Incorporating these nuances will make your rose feel vibrant and lifelike.
Blending Techniques
As you refine details, blending can further enhance texture and depth. Use a tortillon or blending stump to soften the transitions between dark and light areas. Working in small circles or gentle strokes can help you achieve a smoother appearance.
However, be careful not to over-blend, as this can lead to a loss of contrast and definition. Purposeful blending helps maintain clarity while providing a softer, more organic look. It’s all about finding your unique style in juxtaposing hard and soft edges.

Evaluating and Adjusting
Stepping Back for Perspective
After working on your drawing for a while, it’s beneficial to step back and evaluate your work from a distance. This perspective will help you see the overall composition and see if the contrast creates the intended depth.
Look for areas that may need more definition or highlights. Identify any sections that might feel too flat and consider adding more layers to enhance the contrast. Taking a break will allow you to approach your drawing with fresh eyes, helping you make effective adjustments.
Seeking Feedback
Consider sharing your work with peers or instructors to gain constructive feedback. This input can be invaluable, as others may notice aspects you haven’t. Engaging in discussions about your techniques can provide fresh insights and help you understand how effectively you’ve utilized contrast.
Critiques don’t have to be overwhelmingly negative; they can help you grow as an artist. Embracing feedback fosters a growth mindset and can lead to improvements in future works as well.
Final Touches
Sealing the Drawing
To preserve your charcoal drawing, consider using a fixative. A fixative spray will help keep your work protected from smudging and fading over time. Apply the spray in a well-ventilated area, holding it at a distance to avoid saturating any area too heavily. Be cautious, as too much fixative can alter the texture and appearance of your piece.
Signing and Showcasing Your Work
After sealing your drawing, don’t forget to sign it. Adding your signature authenticates your artwork and marks it as your creation. Choose a corner or area that complements your composition to add this final touch.
Finally, think about ways to showcase your artwork. Consider framing your rose drawing to protect it while enhancing its aesthetic appeal. Displaying your work gives it a fitting home and allows others to appreciate the effort and artistry you’ve poured into it.
Elevating Your Charcoal Drawing Skills
Maximizing contrast in rose charcoal drawing plays a crucial role in creating depth and visual appeal. By understanding the nuances of your materials, focusing on blending and layering techniques, and refining details with intent, you can significantly elevate your artwork. Regularly stepping back to assess and engage with peers will enhance your experience, and embracing feedback can only strengthen your skills. With practice, patience, and creativity, you can make stunning charcoal drawings that truly capture the beauty and essence of a rose.