Introduction to Oil Pastels
Oil pastels are a unique art form with vibrant colors.
The Young Medium with a Rich History
First made in Japan for children, early 20th century. Picasso and Sennelier enhanced them in the 1940s.
Benefits of Oil Pastels for Artists
These tools are blendable and offer artists immediate color application. They work well on many surfaces and are portable, perfect for outdoor sketching.
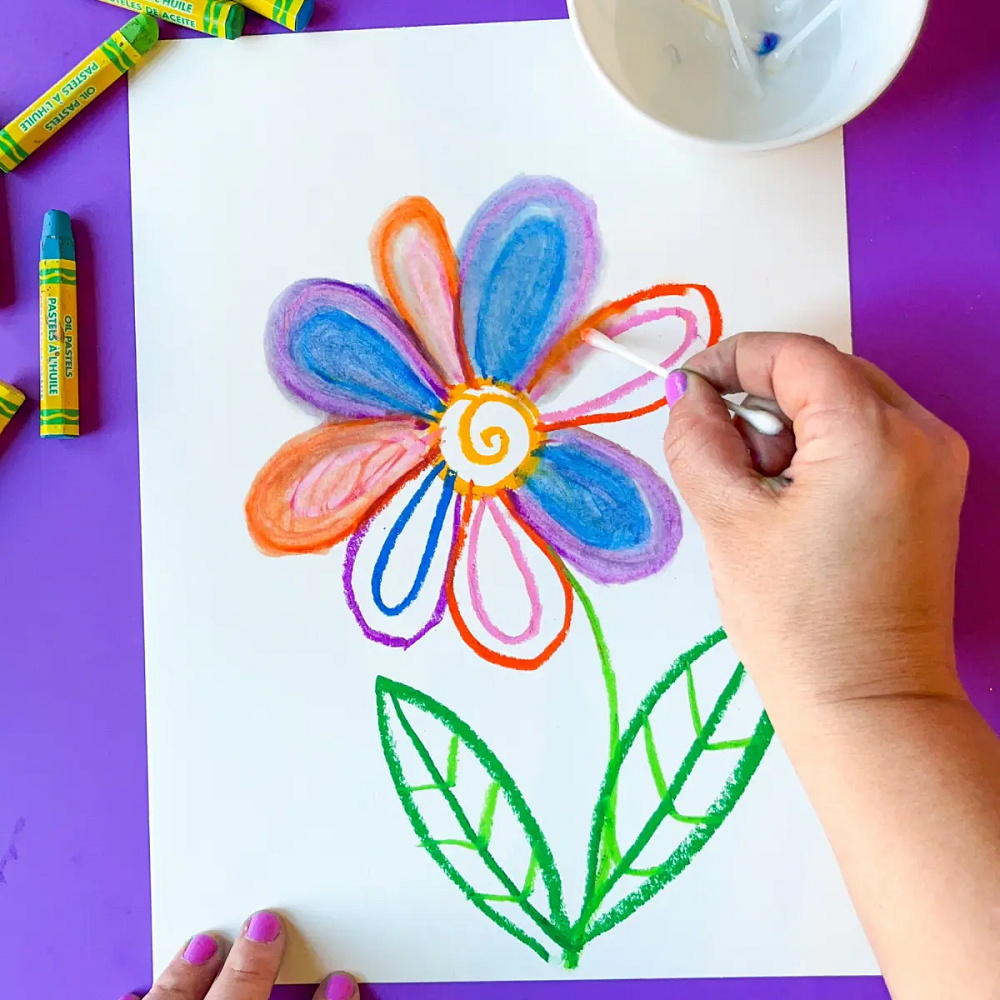
Getting Started with Oil Pastels
Getting started with oil pastels is thrilling and full of potential. Before diving into your first pastel piece, you’ll want to gather the right materials, set up a suitable workspace, and select the best surface for your artwork. Here are some guidelines to help you begin your oil pastel journey.
Selecting the Right Materials
When it comes to materials, quality is key. Select a set of oil pastels that offer rich, true colors and smooth application. Avoid cheaper sets that may be waxy and less vibrant. You’ll also need paper or a surface to draw on, blending tools like paper stumps, and a fixative spray to preserve finished pieces.
- Pick oil pastels from reputable brands for richer colors.
- Choose textured paper or canvas that will hold the pastel well.
- Gather blending tools such as paper stumps or blending sticks.
- Get a fixative spray to protect your artwork once it’s done.
Preparing Your Workspace
An organized, well-lit workspace can greatly enhance your oil pastel experience. Make sure your area is well-ventilated, especially if you’re planning on using solvents. Have cleaning materials like paper towels and wet wipes handy to manage the mess that using oil pastels can sometimes create.
- Find a bright area to see your colors clearly.
- Ensure good airflow, particularly when using thinners.
- Cover your workspace to protect it from stains.
- Keep your tools and materials within reach.
Choosing the Best Surface for Your Art
The surface you choose can affect the final look of your artwork. While paper is most common, there are a variety of surfaces that suit oil pastels well, including canvas, wood, and even glass with the right preparation. For starters, heavyweight paper or pastel paper works great.
- Start with heavyweight or pastel paper for easier handling.
- Experiment with canvases or wood for different effects.
- Prep glass or metal surfaces with a base layer if you want to try them.
- Pick a surface that matches the style you’re going for.
By selecting the right materials, setting up your workspace thoughtfully, and choosing the surface that best suits your artistic approach, you’re ready to embark on the adventure of creating with oil pastels.
Basic Oil Pastel Techniques
When using oil pastels, mastering essential techniques is important. This helps bring texture, depth, and realism to your art. Let’s explore how to create with oil pastels effectively.
Achieving Texture and Depth
Texture gives life to your artwork. Using oil pastels in different ways can add texture. Try layering thick pastels for a bumpy surface. Or use tools to scratch lines into a color for depth. Varying pressure can also change how the color looks on the surface.
- Layer oil pastels thickly for an impasto look.
- Scratch the pastel surface for interesting details.
- Change stroke pressure to alter texture.
Blending and Color Mixing
Blending is key to using oil pastels. It helps mix colors smoothly on your art surface. You can use fingers, blending stumps, or even cloth to blend. Color mixing creates new shades and adds dimension.
- Blend colors with fingers or tools for soft transitions.
- Mix colors right on the canvas to find new hues.
- Practice blending light into dark for shadow effects.
Tips for Layering and Underdrawing
Layering is building color from light to dark. Start with lighter colors, and add depth with darker shades. Underdrawing is sketching the base of your art. It guides where to put your pastels.
- Begin with light colors, then add dark layers on top.
- Use underdrawing as a roadmap for your pastel work.
- Keep layers thin to avoid muddying your colors.
Advanced Oil Pastel Techniques
When you get the hang of basic oil pastel methods, it’s time to level up. Advanced techniques can add drama and uniqueness to your work. Here we dive into a few sophisticated methods to enhance your art.
Creating Impasto Effects and Textures
Impasto techniques make your work pop literally. Applying thick pastel layers adds a 3D effect to your piece. Get creative with a knife or your fingers to layer pastels thickly. This way, your artwork gets a textured, tactile look.
- Apply oil pastels heavily for a raised surface.
- Experiment with different tools for unique textures.
- Use texture to convey feelings or movement in your art.
Exploring Sgraffito and Dry Brushing
Sgraffito brings a dynamic edge to your oil pastel work. Scratch away the top layer to show colour from below. Dry brushing is great for a rough effect. Use a stiff brush for scratchy, textured strokes. These methods are perfect for adding intricate details and highlights.
- Scratch into thick pastel layers for sgraffito detail.
- Dry brush lightly over pastels for a fuzzy texture.
- Combine both techniques for contrast and intrigue.
Advanced Blending for Gradients and Smooth Transitions
Advanced blending is about creating seamless colour changes. For gradients, lay down two colours and blend where they meet. Use a light touch and maybe a bit of mineral oil for smoothness. This gives the illusion of depth and can mimic natural light.
- Layer colours and then blend for smooth shading.
- Try mineral oil for extra blendability.
- Master transitions for realistic lighting and shapes.
By mastering these advanced oil pastel techniques, like impasto and sgraffito, you can add texture and dimension to your art. Blending for gradients and smooth transitions can turn a good piece into a great one. With these skills, you’re well on your way to creating extraordinary oil pastel masterpieces.
Tips for Preserving and Displaying Oil Pastel Art
When your oil pastel creation is finished, preservation is key. This section focuses on how to keep oil pastel artwork in perfect condition and display it proudly.
Fixative Use and Artwork Storage
- Applying a fixative spray protects your art from smudging and dust. Choose one made for oil pastels.
- Store your artwork flat in a cool, dry place. Avoid direct sunlight.
- Use acid-free papers to separate art pieces in storage. This prevents colour transfer.
- Frame your art under glass for extra protection. Make sure the glass doesn’t touch the pastels.
- Check your artwork periodically for any changes in colour or texture. Address promptly if needed.
Troubleshooting Common Oil Pastel Issues
- If colours mix and turn muddy, layer more carefully. Start with light colours, then dark.
- When pastels aren’t sticking to the surface, add a base of clear gesso. It helps grip the pastels.
- For stubborn smudges, gently scrape off excess pastel. Then, touch up with fresh layers.
- If work becomes too oily, blot excess oil with paper. Then continue with your piece.
- When fixing mistakes, use an eraser carefully. Do not rub too hard to avoid damage.
By using fixatives and proper storage, you can extend the life of your oil pastel artworks. Troubleshoot issues with these tips for best results. These strategies aid in preserving your art’s vibrancy and integrity over time.
Project Ideas and Inspiration
Drawing with oil pastels opens up a world of colorful possibilities. Here are some project ideas to spark your creativity.
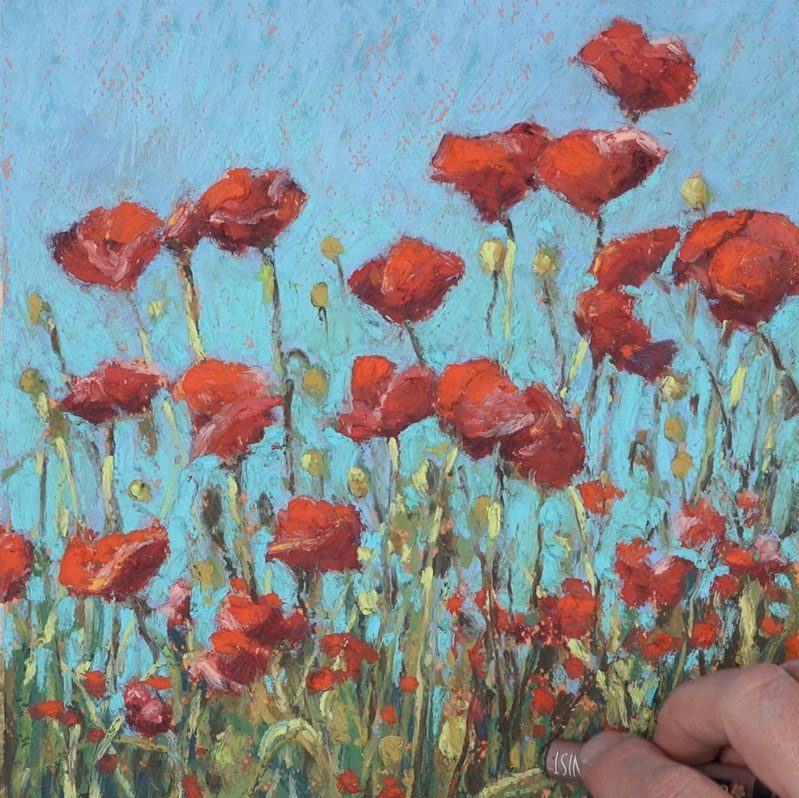
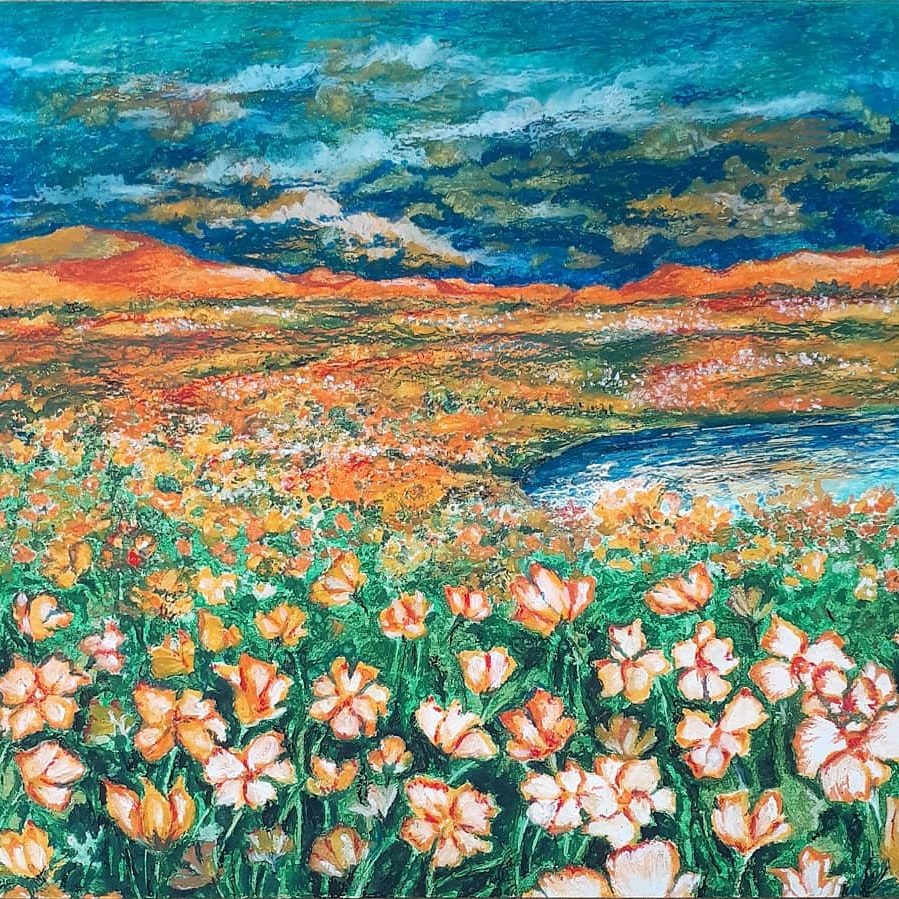
Crafting Vibrant Landscapes
Landscapes are a great way to practice using oil pastels. Start with simple scenes. Use bold colors for skies and fields. Blend gently to create sunrise or sunset effects. Add texture to trees and water with different strokes. Try capturing different times of day or seasons to challenge your skills.
- Choose a simple landscape to begin.
- Use strong colors for parts like the sky.
- Mix colors softly for morning or evening skies.
- Add details to nature elements for realism.
Experimenting with Still Life Compositions
Still life paintings are classic. They help artists focus on shape and light. Arrange fruits, flowers, or objects on a table. Observe how light plays on surfaces. Translate this into your pastel work using shading and highlights. Play with composition and color for different moods.
- Set up a few objects for your still life.
- Notice how light creates shadows.
- Draw objects, then add dark and light areas.
- Change colors and arrangement for new looks.
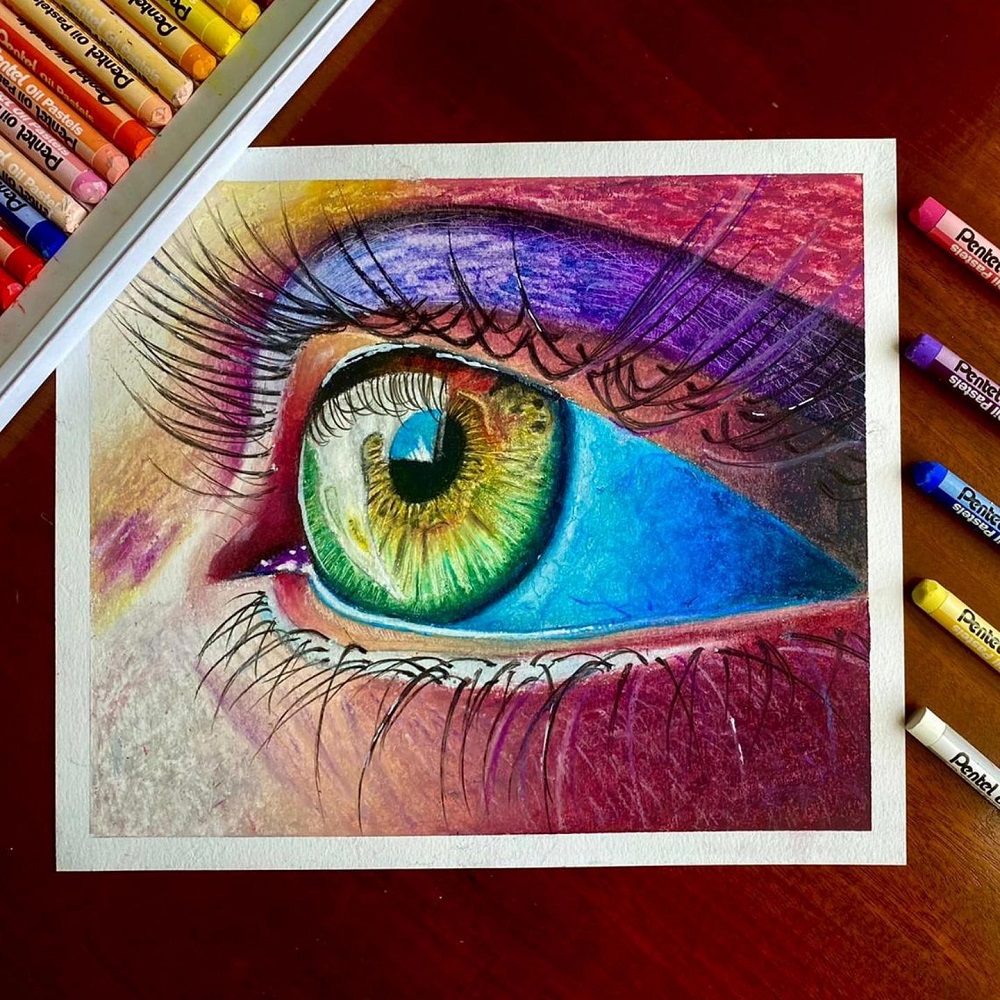
Approaches to Portraiture with Oil Pastels
Portraits with oil pastels can be striking. Focus on facial features and expressions. Start with a basic outline, then build up colors. Blending is important for skin tones. Use lines and contrasts for defining features like eyes and lips. Portraits can be realistic or abstract, so experiment.
- Begin with a face outline.
- Layer colors for the skin tone.
- Blend smoothly for realistic skin.
- Detail eyes, nose, and mouth with sharp contrasts.
Abstract and Expressive Oil Pastel Art
Abstract art lets you play with oil pastels freely. There are no rules. Combine shapes, lines, and colors in new ways. Let emotions guide your color choices. Use strong marks and blends to express ideas. Abstract art can be a fun way to experiment with oil pastels.
- Mix shapes and lines in your drawing.
- Choose colors that reflect your mood.
- Make bold strokes and combine colors.
- Blend colors for effect but keep some edges sharp.
Conclusion
Embracing Continuous Learning and Experimentation
Oil pastels invite artists to an ongoing learning journey. Experimenting is at the heart of mastery. By trying new techniques, artists discover their unique style. Continuous practice with colours, textures, and layers reveals new insights. Mistakes are chances for growth, pushing creative boundaries further. Workshops, online tutorials, and artist communities offer endless ways to learn. Dedication to the craft means always being a student, open to exploration and change.
- Experiment to find your artistic voice.
- View mistakes as opportunities to improve.
- Seek new learning resources regularly.
- Stay curious and open to new ideas.
The Journey of Creative Exploration with Oil Pastels
Creating with oil pastels is more than making art—it’s a personal journey. Each piece reflects a story, an emotion, a moment in time. The freedom to express through vibrant colours and dynamic textures is exhilarating. As artists, embracing the versatility of oil pastels fuels a never-ending adventure. Share your work, invite feedback, and connect with others on the same path. Let the joy of creation with oil pastels light up your artistic spirit.
- Every artwork tells a personal story.
- Use vibrant colours to express emotions.
- Share your creations and connect with others.
- Let oil pastels inspire your art and soul.