Introduction to Oil Pastels
Engaging in oil pastel art is easy and rewarding. Perfect for beginners, oil pastels offer a world of vibrant colors and creative possibilities. Their unique texture blends smoothly on paper, unlocking a new realm for artistic expression. In this blog, we’ll explore the essentials of oil pastels, covering everything from the materials you need to the basic techniques that lay the foundation of oil pastel art, making it easy for anyone to start.
Oil pastels consist of pigment mixed with a non-drying oil and wax binder, creating a stick form that’s both versatile and forgiving. Their soft, buttery consistency glides onto surfaces, allowing for subtle nuances in shading and the bold layering of colors. Unlike other mediums, oil pastels don’t require brushes or palettes; you can apply them directly onto your canvas. This medium’s accessibility makes oil pastel art easy to dive into, whether you’re at home, in a studio, or outdoors.
Starting with oil pastels is straightforward. With a few basic materials such as paper, a set of oil pastels, and your imagination, you’re ready to create. The simplicity of the medium encourages experimentation, making it ideal for those exploring their artistic interests. As we move forward, we’ll delve into the necessary tools, share step-by-step techniques, and offer advice to elevate your oil pastel projects. So if you’re looking to let your creativity run wild with colors that pop, prepare to embrace the joy of oil pastel art easy and fun for all.
Essential Materials for Starting with Oil Pastels
To embark on your oil pastel art easy journey, you need a few key materials. The good news is, the list is short and the items are readily available. Let’s take a look at what you’ll need to get started.
Oil Pastel Set
Firstly, acquire a set of oil pastels. Sets come in various sizes, from basic to extensive. Pick a set with a range of colors to give yourself plenty of creative freedom.
Substrates
Next, select your substrates, such as paper, canvas, or wood. For beginners, thick, heavy-weight paper is best. It withstands the pressure of layering the pastels.
Protective Sheets
Consider getting protective sheets to place between your art pieces. They prevent smudging when you stack or store your works.
Fixatives
A fixative spray is optional but helpful. It seals your work and protects it from dust and smudges.
Scrapers and Knives
For techniques like scraping or sgraffito, pick up some scrapers or palette knives.
Blending Tools
Get tools for blending, like paper stumps, your fingers, or a cloth. Blending transforms the colors on your canvas.
With these materials in hand, your oil pastel art journey can begin. Each tool opens up possibilities for expression and creativity, making your oil pastel experience easy, enjoyable, and full of learning.
Basic Oil Pastel Techniques
Mastering basic oil pastel techniques is essential for beginners. Start with these simple methods to lay the foundation of your oil pastel journey.
Stippling
Stippling means creating lots of small dots. Use the tip of your oil pastel for this. It’s great for adding texture.
Scumbling
Scumbling involves layering light strokes over another color. Do this with the side of the pastel to create a textured effect. It blends colors subtly.
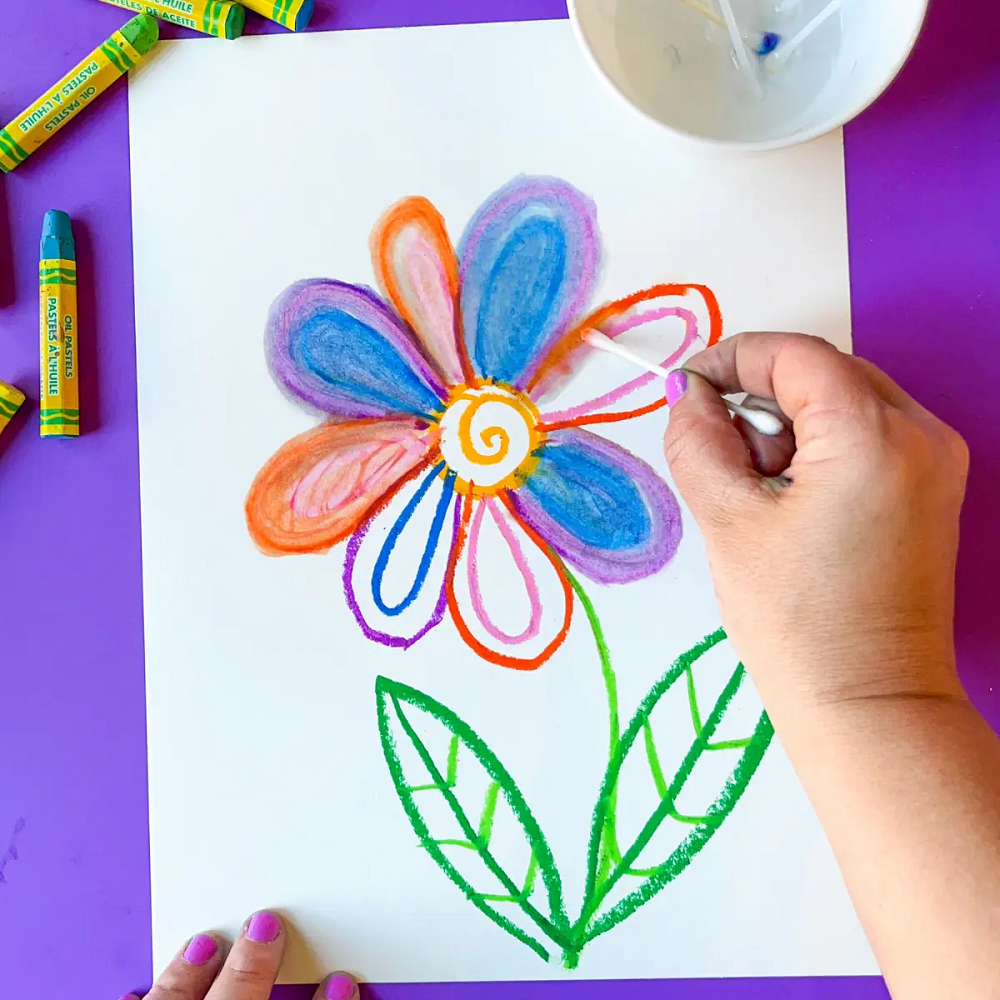
Blending
Blending colors is key in oil pastel art. Use your finger, a cloth, or a blending stump. Softly mix the colors on the paper until they smoothly transition.
Layering
Layering requires putting one color over another. Press lightly at first, then add more layers. This builds depth and richness in your artwork.
Sgraffito
Sgraffito is scratching into a top layer to reveal the color underneath. Use a scraper or a knife. It’s an effective way to create interesting patterns.
By practicing these techniques, you’ll begin to understand the versatility of oil pastels. Remember to keep practicing, as oil pastel art becomes easier and more intuitive with each creation.
Step-by-Step Guide to Your First Oil Pastel Artwork
Creating your first oil pastel piece needn’t be daunting. Follow this easy guide, and you’ll have a colorful artwork in no time.
Choose Your Subject
Start simple. Pick a subject that excites you, yet isn’t too complex. Still life or landscapes are good options for beginners.
Prepare Your Workspace
Clear a flat area. Lay down newspaper to keep it clean. Ensure good lighting and ventilation for a safe and clear view.
Sketch Your Outline
Lightly draw your subject’s outline on paper. Don’t press hard; you can cover mistakes with oil pastels later.
Block in Colors
Fill in large areas with your base colors. Use the side of your pastels to cover these sections quickly.
Add Details and Textures
Use the tip of your pastels for details. Try techniques like stippling or scumbling to add texture.
Layer and Blend
Overlay colors to create depth. Blend them using your fingers or blending tools for smooth transitions.
Refine Your Artwork
Step back and review. Adjust by adding more layers, blending, or scraping until you’re satisfied.
Preserve Your Piece
If you have fixative spray, use it once you’re done. This helps maintain your artwork’s vibrancy.
Following these steps makes creating oil pastel art easy, even for beginners. Patience and practice will help you refine your techniques further. Remember, every artist was once a beginner; start your oil pastel journey today!
Tips for Blending Colors in Oil Pastel Art
Blending colors is a key step to making your oil pastel art easy and vibrant. Here are some helpful tips for blending that will elevate your artwork.
Start with Clean Pastels
Make sure your oil pastels are clean before you start blending. Dirty pastels can muddy your colors.
Use Light Pressure at First
Begin with a gentle touch. You can increase pressure as you mix the colors more thoroughly.
Blend Gradually
Work slowly, blending colors bit by bit. This gives you more control over the final hue.
Try Different Tools
Experiment with blending tools. Your fingers, a cloth, or a blending stump can all yield unique effects.
Layer Colors Thoughtfully
Think about which colors to layer. Some mix well together, while others do not.
Practice Makes Perfect
The more you blend, the better you’ll get. So, keep practicing to find what works for you.
Blending well can take your oil pastel art from good to great. With these tips, blending colors in your artwork will become easier and more effective.
Common Mistakes and How to Avoid Them
Engaging in oil pastel art can be a smooth ride if you know the common pitfalls. Beginners often face challenges that can hinder their progress. Here are frequent mistakes and tips on how to avoid them, making your oil pastel art easy and trouble-free.
Working on Unsuitable Paper
A mistake you might make is using the wrong paper. Thin paper can tear or not hold the pastel well. Always pick thick, heavyweight paper that resists tearing. This ensures your artwork stays intact during the creative process.
Pressing Too Hard from the Start
Another error is applying too much pressure at first. This makes it hard to layer colors later. Start with soft strokes. You can add more pressure to deepen the color as your work progresses.
Skipping the Sketching Phase
Some skip the initial sketch, but this outline guides your artwork. Take the time to draw a light outline before starting with pastels. It will make adding colors and details easier.
Not Blending Colors Carefully
Poor blending can leave your work looking rough. Be gentle and patient when blending. Use clean pastels and blend gradually. This creates smooth transitions and a polished finish.
Overlooking the Fixative
Not using a fixative can lead to smudges. If you want to preserve your work, use a fixative spray once you’re done. It will protect your art from dust and smudging.
Forgetting to Clean Your Pastels
Dirty pastels mix unwanted colors into your work. Keep your pastels clean. After use, wipe them down to avoid muddying your vibrant colors.
By avoiding these common mistakes, you’ll find that oil pastel art is easy and fun. With each piece, your skills will improve, and you’ll be creating stunning art in no time.
Inspiring Ideas for Beginner Oil Pastel Projects
Getting started with oil pastel art isn’t just about learning techniques; it’s also about finding inspiration. Here are a few project ideas that are perfect for beginners looking to explore the medium of oil pastels.
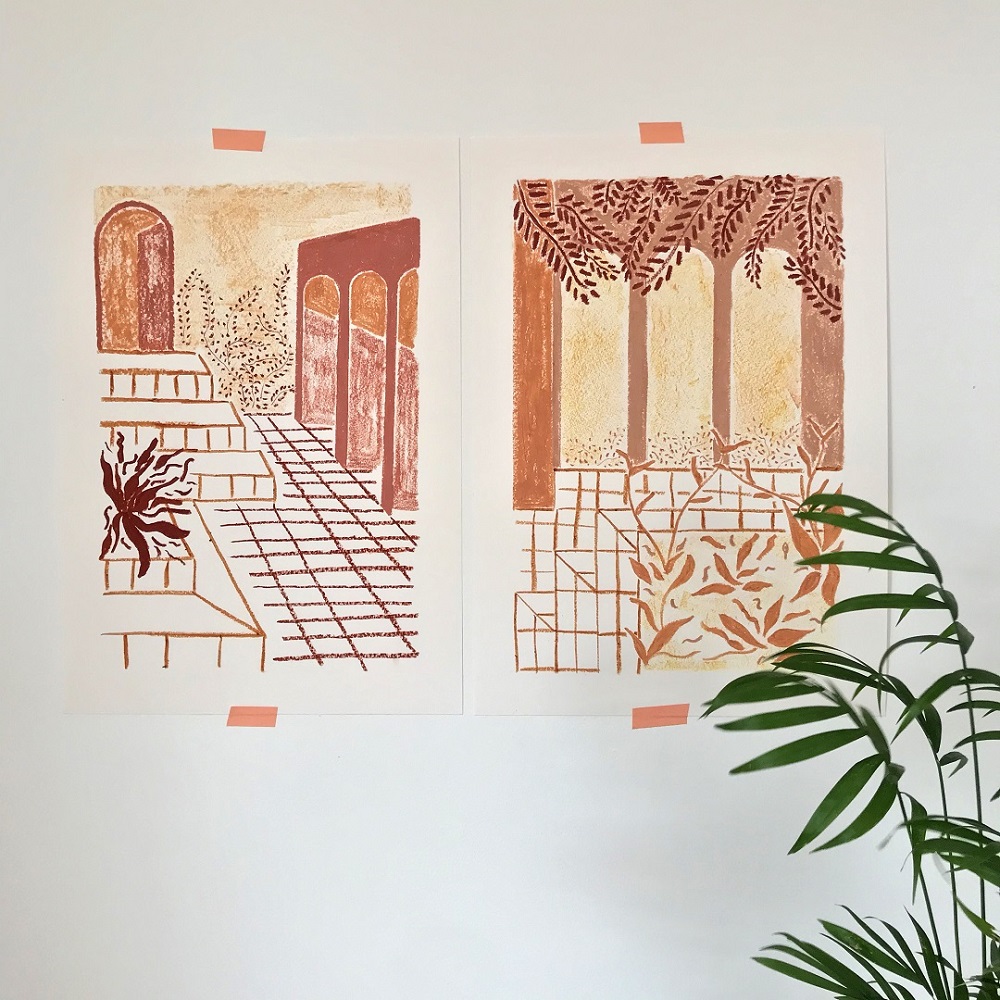
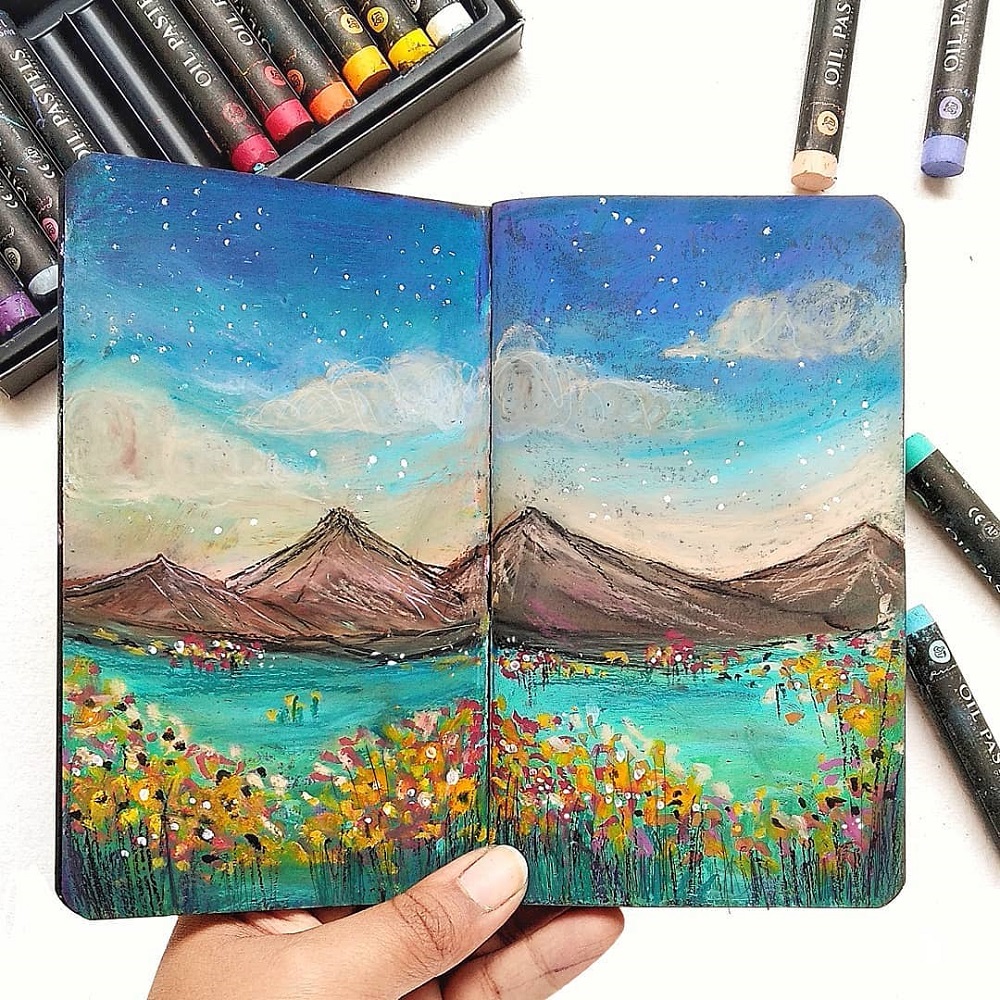
Simple Landscapes
Start with simple landscapes. Think rolling hills, a sunset sky, or a tranquil lake. Use broad strokes to lay down the base colors. Then layer and blend to create depth in the sky or reflection on water.
Fruit Still Lifes
Try a still life with fruit. Choose bright, contrasting colors to make each piece pop. Focus on the light and shadows to bring your fruit to life. Blending plays a key role here to create smooth transitions.
Abstract Patterns
Abstract art is great for experimentation. Mix colors wildly. Create bold patterns. Use the sgraffito technique to scratch in lines or shapes. There are no rules, so let your imagination run free.
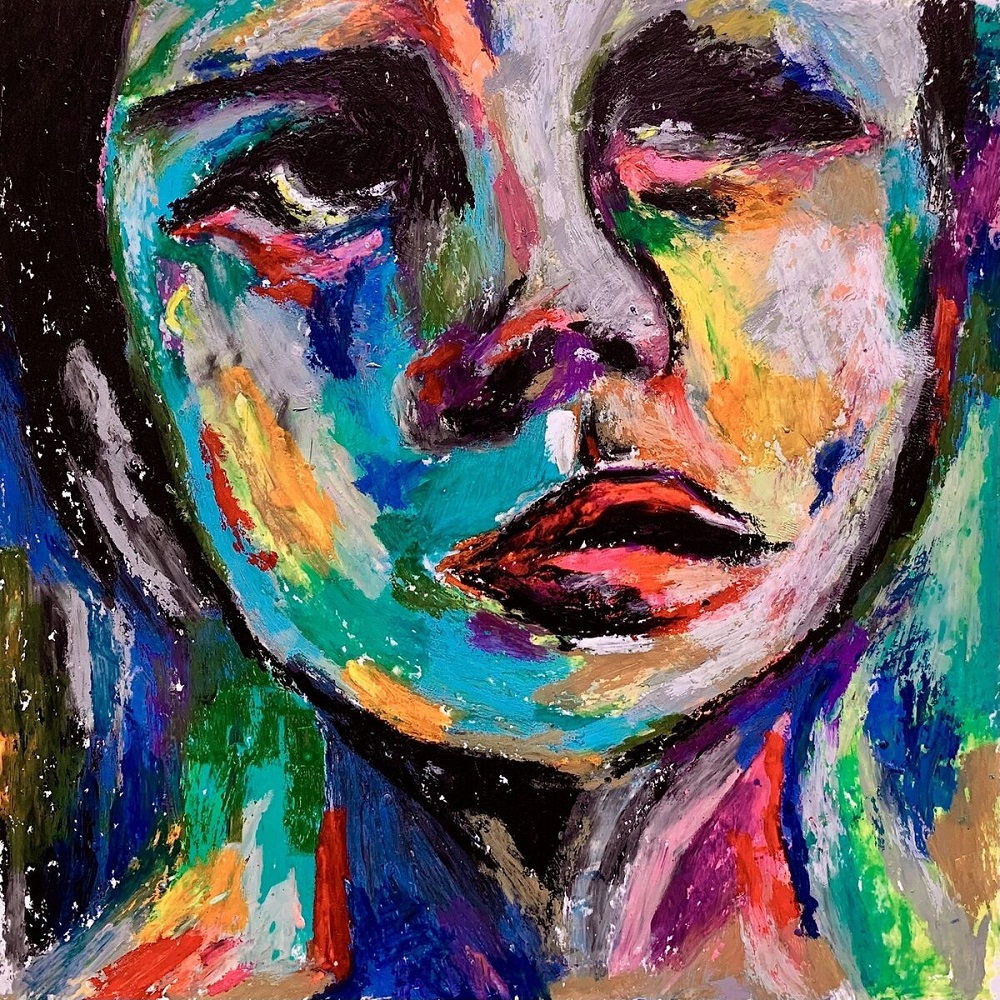
Portraits with a Twist
Attempt portraits with a twist. Think monochrome or only warm/cool colors. Play with the colors to depict emotions or moods. Portraits challenge your skills but can be very rewarding.
Replicate a Famous Painting
Choose a famous painting and make a version with oil pastels. It’s a fantastic way to study color and technique. Plus, it’s rewarding to see your rendition of a classic.
Dreamscapes
Create dreamscapes, blending reality with fantasy. Mix real-world elements with fantastical colors or creatures. Oil pastels are perfect for surreal, dream-like art.
Remember, the key to making oil pastel art easy is to have fun and experiment. Each project idea gives you a chance to use the tips and techniques you’ve learned. So grab your pastels and start creating!
Resources for Further Learning and Practice
To improve in oil pastel art and find it easier over time, one must continue learning and practicing. Here are some valuable resources you can tap into for further growth.
Online Tutorials and Workshops
Look for online tutorials that break down complex art concepts into simple, manageable lessons. Workshops often provide step-by-step guidance and can be great for hands-on learning.
Art Books and Magazines
There are many books and magazines focused on oil pastel techniques. They offer inspiration and practical tips that cater to both beginners and seasoned artists.
Community Art Classes
Check out local community centers or schools. They may offer art classes where you can learn oil pastel art alongside others.
Art Supply Stores
Some art supply stores hold classes or demonstrations. They can help you understand materials and techniques better.
Online Art Communities
Join online art forums or social media groups. They’re platforms where artists share tips, provide feedback, and motivate each other.
Practice Regularly
The most crucial resource is your commitment to practice regularly. Set aside time each day or week to work with oil pastels.
By making use of these resources, you’ll gain new insights and improve your oil pastel art skills. Remember to keep your pastels handy, your creativity flowing, and your willingness to learn ever-present. With dedication, you’ll see your oil pastel art become easier and more fulfilling.